Sunday 27 October 2013

More ubiquity – the walkaway dress


When I saw Butterick B4790 in the pattern book it called to me.
This is a reprinted 50s pattern of a wrap dress that is shaped like a pencil skirt at the front and like a circle skirt at the back.
From a perusal of vintage sewing blogs I discovered that this pattern had been made by just about everyone and was known as the ‘walkaway dress’ because you could "start it after breakfast... walk away in it for luncheon!" I decided on a print and plain combination of cottons for mine.

I lined the front, partly because I was afraid the light fabric would be see-through and partly in an attempt to prevent the dress being dragged backwards by the weight of the circle skirt.
Apart from the hems all the edges are bound – by machine, I had not yet discovered the joys of hand sewing.
 I had planned for this dress to be part of my everyday wardrobe, but my experience of wearing it is that it is a bit awkward. The front skirt catches on things (eg the overskirt, my knees, itself) and bunches up so I am constantly having to smooth it down. The dress requires a petticoat because the edges of the front skirt sometimes creep forward from behind my legs. The circle skirt has a tendency to overlap weirdly in the centre front which loses the pencil skirt/circle skirt effect (although this may be a result of my binding technique).

Front and back closures.

It’s a shame that it is so awkward to wear, as it really is a lovely dress. However, it still serves well as a costume for 1950s themed parties.


Thursday 24 October 2013

I can’t call it historical ‘cos my mum was in high school then

When I added -isms: understanding fashion to my sewing library there was one dress in particular that caught my eye. It was a 1972 gown designed by Bill Gibb and worn by the singer Sandie Shaw (who, I’m afraid, I’d never heard of) and used in the book as an example of ‘World Clothing’.
Inspiration dress at the V&A
The 
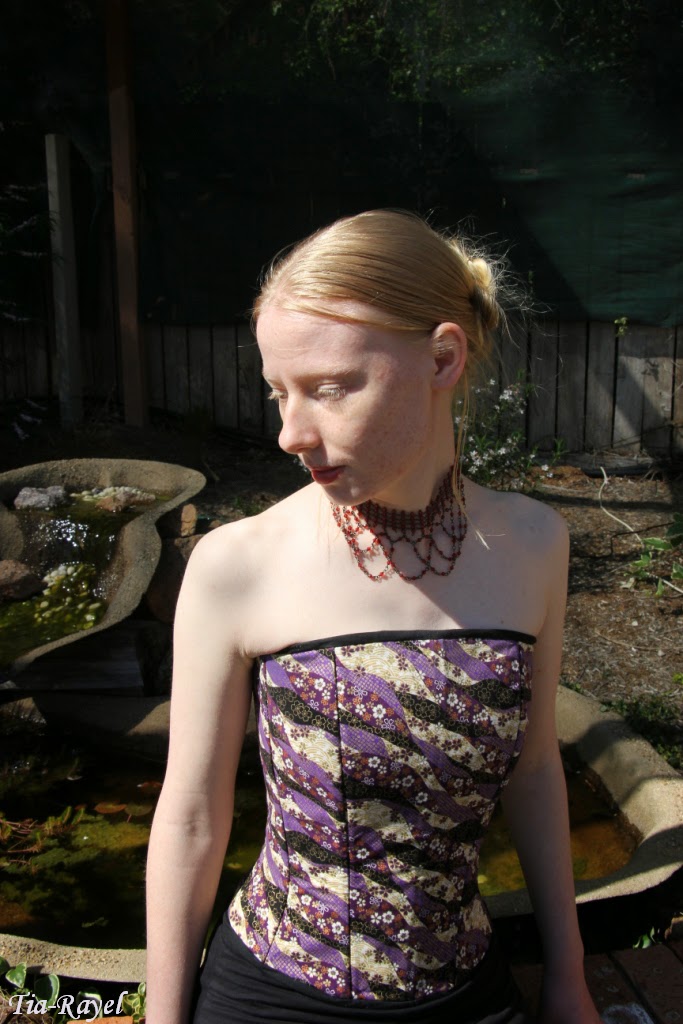
original design is described as incorporating influences from medieval dress, folk costumes and the hippy movement. When I was working out how I would interpret this design I decided that I wanted to avoid the earthy colours of the original and instead juxtapose the hippy design with more distinct/futuristic/tech-society colours: black and white with red highlights.
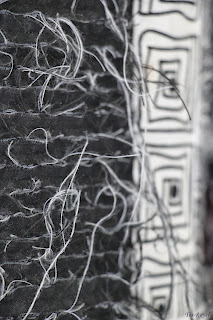
I still wanted to have a pair of busy dark/light prints and a box-patterned trim
We scoured the local quilting shops for coordinating prints and eventually found a set that went together nicely. I omitted the dangly embroideries on the sleeves and bodice of the original dress. For the front of my dress I made a slashed feature panel.

I achieved this look by alternating layers of black and white fabric; sewing lots of parallel lines across them and then cutting all but the bottom layer of fabric in between the stitching.
For some reason I didn’t find any information for this dress online when I was making it. Things I didn’t know included: there are two lines of boxes down the front of the skirt (I don’t think I had enough fabric for that), the original dress is lined and it closes with a back zip.

I’m pretty sure my mum told me to put a zip in it and I refused (“zips haven’t been invented yet” will be what I scribble on walls should I ever go mad) and my decision has resulted in a dress that is a bit looser than it might otherwise have been and is difficult to get on and off (especially at the mid sleeve gather-point – although the zip wouldn’t have changed that).  On the bright side, at least the back isn’t broken up by an ugly zip – because I didn’t know about invisible zippers then. (There are 3 types of zip in the world – featured, invisible and ugly.)
I’m not sure why my waistline ended up being so much lower than the original – it’s something I only noticed when writing this post.
About the time I made this dress I was becoming dissatisfied with the quality of my sewing. I had been using many shortcuts, so for this dress I decided to do things properly. This was the first piece for which I ironed out the seams during construction and finished each edge separately. It was a big improvement, but looking at it now it is still quite rough in places.
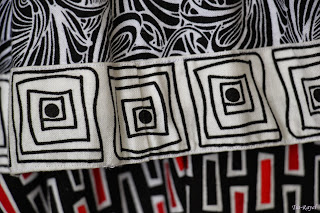
Notice how carefully the box is matched at the seam and how neatly the stitching lines fit between the print and the edge of the fold.
I can’t find the pattern I made but my recollection is that it was adapted from a vest pattern combined with many rectangles. Maybe I only used measurements for the rectangles and the reason I can’t find a pattern is that one never existed.


Sunday 13 October 2013

The ubiquitous Simplicity 2172

Like every other costumer, it seems, I was quite taken by Simplicity 2172 when it was released. I ordered it at my local sewing shop (where it had already sold out) and decided to make a version of the coat for everyday wear.  
I chose to omit the neck and sleeve ruffles so the coat would look a bit more utilitarian and I raised the neckline. I also left off the back lacing as the line of the coat is so nice without it. Once I had finished the coat I kept noticing that the neckline gaped a bit so I put a pleat on each side.
This coat is lined, which is a technique I struggle with a bit. There are some parts of the coat that don’t sit quite right and I expect the sleeve linings to pull free at any moment but overall I think it turned out okay.
 
The main thing I learned from lining the coat was to not use designated lining fabrics. Putting this coat on actually makes me cold due to the feel of the lining fabric, and it takes a while to warm up. As it is a reasonably light coat, for spring or autumn wear, this does not matter so much, but I will remember this for when I make a winter coat. The lining is also inclined to fray and pull apart around the stitches – hence my fear for the sleeves.
The coat pattern has pockets – and a good technique for making them.
I have made the corset from this pattern several times and have found it to be very comfortable. I can’t speak for the instructions though, as I used the method from Truly Victorian TV110 adapted to include a layer of fashion fabric. All have an inner layer of coutil and are boned with cable-ties (two in each channel).

 This one goes in my everyday wardrobe:
This one is part of my Ice Goth outfit:
And here I adapted the pattern into a bodice for my Misery costume:


Monday 7 October 2013

A weekend of finishing things

On Saturday I finished:
On Sunday I finished:
and this:
(Just the scene, not the dress.)
On Monday I did a series of photo shoots, so posts on the above outfits and more will be forthcoming:

I also handed in a uni assignment (early) so all in all, a weekend well spent.